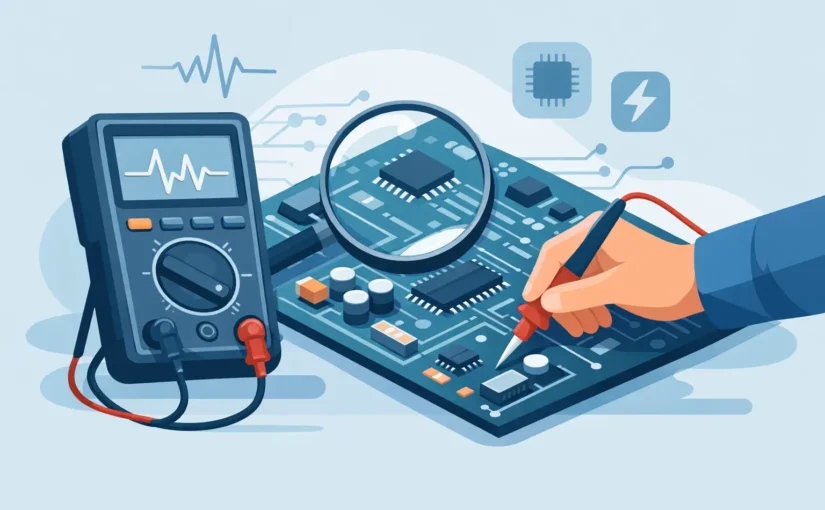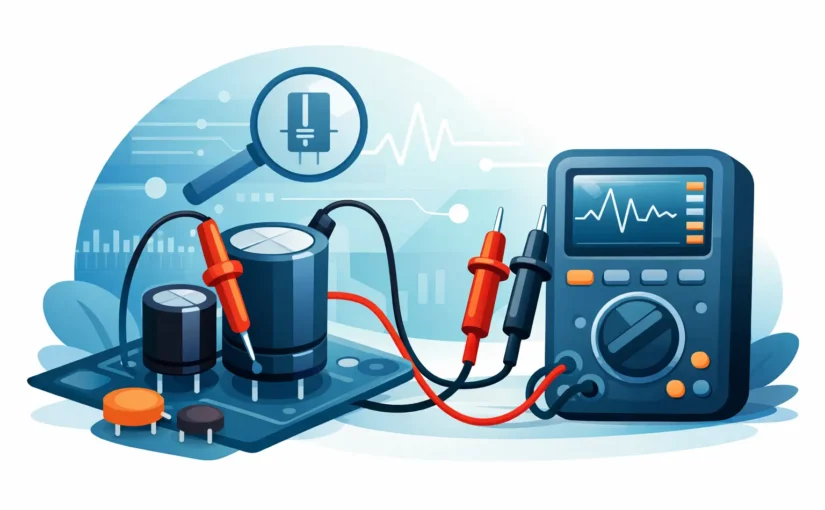
How to Test Capacitor ESR With Confidence

A capacitor can measure close to its marked capacitance and still be the reason a power supply oscillates, an LED driver flickers, or a digital rail collapses under load. Equivalent series resistance, or ESR, exposes losses that a capacitance-only measurement can miss. Knowing how to test capacitor ESR correctly means controlling the test setup, selecting a meaningful frequency, and comparing the result to a relevant specification rather than treating one resistance value as universally good or bad.

What capacitor ESR measures

An actual capacitor is not an ideal capacitance. Its internal foil, electrolyte, terminations, dielectric losses, and current path contribute resistance and inductance. ESR is the resistive portion of that non-ideal behavior at a stated test frequency. It represents energy dissipated as heat when AC ripple current flows through the part.

For an aluminum electrolytic capacitor in a switching regulator, excessive ESR can create output ripple, poor transient response, and self-heating. For a multilayer ceramic capacitor, ESR is often extremely low, so fixture resistance and contact quality may dominate the measurement. Film capacitors, tantalum capacitors, polymer capacitors, and supercapacitors each have different expected ESR ranges and frequency behavior.

That last point matters. ESR is not a fixed DC resistance. A data sheet may specify impedance or ESR at 100 Hz, 120 Hz, 1 kHz, 10 kHz, or 100 kHz. A reading only has engineering value when its test frequency, signal level, temperature, and connection method are understood.

How to test capacitor ESR accurately

Begin with safety and component condition. Remove power from the circuit, discharge the capacitor through an appropriate resistor, and verify residual voltage with a meter. Never place an ESR meter directly across a charged capacitor. A stored charge can damage the instrument and create a serious safety hazard, particularly in high-voltage power supplies or large bulk capacitor banks.

For the most reliable result, test the capacitor out of circuit. This isolates the device from parallel capacitors, semiconductors, inductors, and low-resistance PCB paths that can distort an impedance measurement. In repair work, in-circuit ESR testing is often useful as a fast screening method, but it is not definitive. A suspicious in-circuit result should be confirmed after lifting one terminal or removing the component.

Use a meter that measures impedance parameters at a known AC test frequency, not a basic ohmmeter. A DC resistance range will initially show charging behavior and then may drift toward overload. That observation can identify a shorted capacitor, but it does not measure ESR. An LCR meter, dedicated ESR meter, or precision handheld instrument designed for component characterization applies an AC stimulus and calculates the equivalent series parameters.

Before connecting the capacitor, compensate the test fixture. Short the probes or Kelvin contacts and perform the instrument’s short correction if available. For measurements of low ESR, open correction can also be necessary to remove stray capacitance and leakage in the fixture. Compensation should be performed using the same leads, connector, probe spacing, and measurement range used for the test. A low-milliohm measurement made with uncompensated leads can be a measurement of the leads rather than the capacitor.

Direct-contact tweezer instruments are particularly effective for small SMD capacitors because they reduce lead length and allow stable contact at the terminals. For radial or large can capacitors, use short Kelvin clips when possible. The force and cleanliness of the connection matter: oxidized leads, probe pressure, and a loose clip can add resistance that looks exactly like capacitor ESR.

Select a test frequency that matches the decision

Match the test frequency to the component specification or its operating environment. If an electrolytic capacitor is specified at 120 Hz, measure near 120 Hz for incoming inspection against that limit. If the capacitor is used on a 100 kHz switching rail and its data sheet provides high-frequency impedance data, a higher test frequency is more representative of the application.

A single frequency cannot answer every question. Low-frequency testing is useful for comparison with many electrolytic data sheets, while higher-frequency measurements can reveal performance relevant to switch-mode power supplies. At sufficiently high frequency, lead and fixture inductance become significant. The measured parameter may transition from capacitive behavior toward resonance, and reporting only ESR without phase or impedance context can be misleading.

Control temperature and measurement time

ESR changes with temperature, especially in electrolytic capacitors. A cold capacitor can exhibit much higher ESR than it will at normal operating temperature. Conversely, a part warmed by ripple current may test favorably for a short time while still having limited remaining life. If the result is near a pass/fail limit, record ambient temperature and allow the part to stabilize before making a disposition.

Allow the instrument reading to settle, but do not confuse a stable display with a valid result. Auto-ranging meters can briefly change test conditions during range selection. Once the reading settles, confirm that the displayed equivalent model is series resistance and that the selected frequency is documented. In production or quality-control work, those settings belong in the test procedure, not in operator memory.

Interpreting an ESR reading

The correct benchmark is the manufacturer’s data sheet, preferably the maximum ESR or impedance specification at the same frequency and temperature. If no specification is available, compare the reading with a known-good component of the same series, voltage rating, capacitance, package size, and approximate age. Comparing unlike capacitor technologies is rarely useful.

High ESR is usually the failure mode technicians seek, but low ESR is not automatically proof of a healthy part. A shorted capacitor can read extremely low resistance, and a ceramic capacitor with a cracked termination may behave intermittently under mechanical stress despite a normal bench reading. Check capacitance, dissipation factor when available, leakage where applicable, and the circuit’s actual ripple waveform when the fault remains unresolved.

A practical interpretation might look like this: an electrolytic capacitor specified at 0.08 ohm maximum at 100 kHz should not be accepted based on a 0.08-ohm reading measured at 1 kHz with long clip leads. The apparent match is accidental because the measurement conditions differ. By contrast, a compensated four-wire measurement at the specified frequency provides a defensible basis for an acceptance decision.

In-circuit ESR testing: fast, but conditional

In-circuit testing is valuable when troubleshooting densely populated boards, particularly when access is limited or component removal risks pad damage. An ESR meter’s low AC test amplitude may avoid forward-biasing some semiconductor junctions, allowing rapid detection of a clearly degraded electrolytic capacitor without desoldering it.

The limitation is parallel impedance. Multiple capacitors on a power rail can make a failed unit appear acceptable because healthy capacitors lower the measured ESR. Parallel resistive paths can also force the reading downward. Inductors, transformers, protection devices, and IC output stages can produce results that do not represent the capacitor at all.

Treat an in-circuit measurement as strong evidence only when the result is clearly abnormal and the circuit topology supports the conclusion. If the reading is marginal, unexpectedly low, or inconsistent with symptoms, isolate the capacitor by lifting one lead or removing it. This is slower than probing in place, but it prevents a false pass from becoming a repeat repair.

Common errors that produce false ESR results

The most common error is using a two-wire connection for a very low-ESR device. With two wires, probe and contact resistance are included in the result. Kelvin measurement separates the current-carrying and voltage-sensing paths, greatly reducing this error. For milliohm-level work, it is not a luxury; it is a requirement.

Another error is ignoring capacitor technology and package size. A small ceramic capacitor may have ESR far below that of a similarly valued electrolytic capacitor, while a high-voltage film capacitor may exhibit different frequency behavior from either. Use the component’s construction and intended duty to set expectations.

Finally, avoid testing a component that has not been fully discharged or has been removed from a hot circuit without allowing it to cool. Good metrology begins before the probes touch the part. Clean contacts, controlled connections, correct compensation, and traceable instrument calibration determine whether the number on the display can support a repair, production, or failure-analysis decision.

For technicians and engineers who must move from board-level triage to defensible component data, the fastest workflow is not simply measuring ESR. It is measuring it under conditions that make the result repeatable, comparable, and actionable.
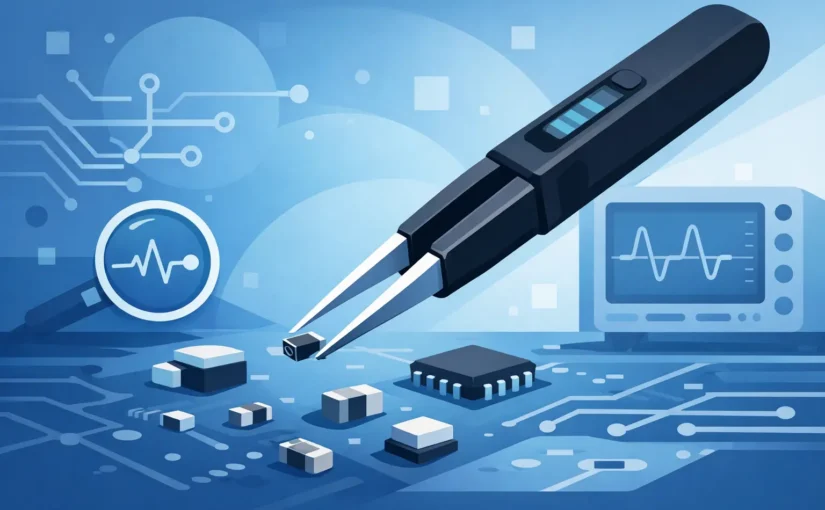
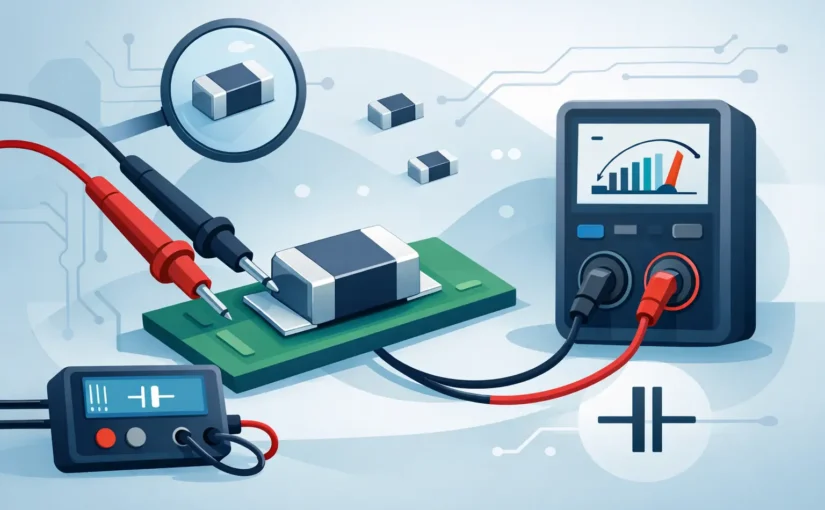
Best Tweezers for SMD Components That Measure

A 0201 capacitor can look perfectly placed, yet be open, cracked, incorrectly loaded, or simply the wrong value. At that scale, the best tweezers for SMD components are not defined only by whether they can pick up a part. They must give the operator controlled mechanical handling and, when troubleshooting or incoming inspection requires it, a dependable electrical connection at the component terminations.

For production placement, rework, failure analysis, and component verification, the right choice depends on the job. Fine hand tweezers excel at placement and alignment. Measurement tweezers add a different capability: direct-contact LCR testing that identifies and characterizes a component without leads, clips, or a large fixture. Treating both tools as interchangeable is a common source of slow work and uncertain results.

What the Best Tweezers for SMD Components Must Do

An SMD tweezer is working against several constraints at once. The tips must reach small terminations without obscuring the work area. Their closing force must be predictable enough to avoid launching a 0402 resistor across the bench or crushing a fragile ceramic capacitor. The body needs enough rigidity that tip alignment remains stable after repeated cycles.

Electrical requirements introduce another layer. Ordinary steel tweezers can hold a component, but they cannot establish a controlled, repeatable test interface. For resistance, capacitance, inductance, and ESR work, each tip must act as an isolated test terminal. The instrument must compensate for its own residual effects and present readings that are meaningful at the value being tested.

This distinction matters most at very low values. A fraction of a picofarad, a few nanohenries, or milliohms of contact resistance can be comparable to the component itself. A tool that is adequate for sorting 10 kΩ resistors may not be adequate for validating a low-inductance RF capacitor or a 1 nH inductor.

Start With the Actual SMD Task

Placement, rework, and visual inspection

For placing components, choose precision hand tweezers with fine, accurately matched tips. Anti-magnetic stainless steel is generally appropriate around magnetic parts and precision assemblies. ESD-safe coatings or conductive materials are preferable where static-sensitive ICs, MOSFETs, and unprotected semiconductors are present.

Tip geometry should follow package size and access. Very sharp tips offer excellent visibility around 0201 and 01005 packages, but they can mark soft terminations and are easier to damage. Fine curved tips improve access under a microscope and reduce wrist angle during rework. Flat or rounded tips distribute force more evenly on larger MLCCs, QFNs, shields, and small mechanical parts.

Mechanical tweezers are the correct tool when the task is physical handling. They should not be selected on the assumption that a good grip also creates a trustworthy electrical test connection.

Component identification and troubleshooting

When answering questions like “What is this part?” or “Is this component still within tolerance?”, smart tweezer meters are the most efficient instrument class. Their integrated tweezer tips contact opposite component terminations directly, enabling rapid LCR measurements without cumbersome test leads. Automatic component recognition instantly identifies resistance, capacitance, or inductance and selects the optimal measurement mode.

Higher test frequencies are critical when measuring miniature capacitors and inductors. While most basic LCR tweezers top out at a 10 kHz test signal—effectively limiting resolution to approximately 10 pF and 100 nH—advanced models like the LCR-Reader R2, R3, MPA, and MPB support test frequencies up to 250 kHz. This extended high-frequency range lowers detection limits down to 0.1 pF and 1 nH similar to professional benchtop meters, making accurate measurement of ultra-small SMD components fast and reliable .

This changes the repair workflow. A technician can lift one end of a suspected component, contact it directly, and compare the reading to the schematic, BOM, known-good board, or component marking. For loose inventory, the same operation quickly separates mixed reels, trays, and salvaged parts without building a dedicated fixture.

In-circuit readings require judgment. Parallel paths can alter the result, semiconductor junctions can affect test behavior, and nearby capacitance or inductance may dominate the measurement. Direct-contact tweezers reduce lead-related parasitics, but they cannot remove circuit topology. When the result is consequential, isolate at least one component terminal.

Quality control and documented measurement

For incoming inspection and controlled production environments, repeatability and traceability matter as much as speed. Look for a defined basic accuracy specification, stated test frequencies, calibration support, and a known method for zeroing or compensating the probes. A display with a stable numeric reading is useful, but it is not evidence of accuracy without these controls.

Data recording can also be decisive. Bluetooth-enabled instruments can transfer readings for inspection records, lot comparisons, and failure-analysis reports without manual transcription. That capability is useful only if the test conditions are controlled: component state, test frequency, test voltage, probe condition, and calibration status should be known.

Tip Geometry Is a Measurement Specification

With ordinary tweezers, tip selection is mostly an ergonomic decision. With measurement tweezers, tip geometry is part of the measurement system. Tips that are too broad may bridge adjacent pads or contact more than the intended termination. Tips that are too sharp may create inconsistent contact pressure, penetrate surface contamination unevenly, or damage delicate electrode finishes.

Fine gold-plated probe tips are often preferred for direct electrical contact because gold resists oxidation and supports reliable low-level connections. The practical goal is not maximum sharpness. It is a repeatable contact patch on the two terminations, with enough visibility to confirm that the probes are not touching adjacent copper, solder fillets, or vias.

Probe spacing deserves the same attention. A narrow gap is essential for tiny chip components, while larger packages may be easier to contact with tips that have a broader working envelope. If a facility regularly handles 01005, 0201, and 0402 parts, evaluate the tool under magnification on representative components rather than relying on a product photo.

Electrical Specifications That Separate Instruments From Handles

A measurement tweezer should be evaluated by the ranges and conditions relevant to the work, not by a generic claim that it “tests components.” The most useful specifications include basic accuracy, resistance range, capacitance range, inductance range, ESR capability, test frequencies, and resolution at the low end of each range.

Frequency is especially significant. Capacitance and inductance are not fixed abstractions independent of test conditions. Ceramic capacitors can exhibit frequency-dependent behavior, inductors have parasitic capacitance and self-resonance, and ESR values change with frequency. A tool operating at higher test frequencies can provide more relevant information for RF, decoupling, and switching-power applications than a low-frequency-only meter.

For extremely small parts, residual compensation is non-negotiable. Open and short calibration routines establish the instrument’s baseline before precision work begins. Perform compensation with clean tips and in the same general configuration used for testing. Recheck it after changing probes, dropping the instrument, or observing unexpected low-value readings.

LCR-Reader® instruments are designed specifically for this direct-contact workflow, combining automatic component identification with precision LCR measurement in a handheld format. Their utility is strongest where bench-meter capability is needed at the board, under a microscope, or at an incoming-inspection station without the delay of lead fixtures.

Siborg also offers dedicated proprietary Open/Short calibration boards, enabling users to null out parasitic capacitance and inductance and extend measurement capability reliably into the sub-pF and sub-nH ranges.

ESD Safety and Operator Control

Static control is not optional when handling modern electronics. Use tweezers rated for ESD-safe work where sensitive components are exposed, and operate within an established grounded workstation program. A dissipative handle alone does not protect a component if the operator, mat, soldering iron, storage tray, and work surface are unmanaged.

Operator feel also affects yield. Excessive spring tension causes fatigue and encourages sudden release. Too little tension can make it hard to control larger components or maintain probe contact during measurement. Test the closing action with the package sizes that dominate the workload. The best tool feels stable at the moment the tips touch, not merely comfortable when held in the air.

A Practical Selection Method

Choose the tool category first, then refine the specifications. For assembly and rework, prioritize tip profile, alignment, ESD behavior, corrosion resistance, and comfortable force. For troubleshooting and inspection, prioritize measurement accuracy, frequency coverage, low-value capability, isolated probes, compensation procedures, calibration options, and data capture where documentation is required.

Do not overbuy measurement range while ignoring the parts actually on the board. A broad capacitance range is useful, but a repair lab working on RF modules may gain more from sub-picofarad resolution and high-frequency testing. Conversely, a power-electronics group may place more value on ESR behavior, larger capacitance coverage, and durable tips suited to repeated contact with larger MLCCs.

Keep probe tips clean. Flux residue, oxide films, skin oils, and worn plating introduce unstable contact resistance and false failures. Clean according to the instrument manufacturer’s guidance, inspect alignment under magnification, and replace damaged tips before they turn a measurement problem into a production decision.

The right SMD tweezers shorten the distance between suspicion and evidence. Select them around package geometry and the required measurement confidence, then verify their performance on known reference components before asking them to decide whether a board passes, fails, or goes back to rework.

How to Test SMD Capacitor the Right Way

A tiny MLCC or tantalum can stop an entire board, and finding the bad part is rarely about capacitance alone. If you need to know how to test SMD capacitor parts accurately, the real job is separating normal behavior from leakage, short conditions, bias effects, and in-circuit measurement errors.

Surface-mount capacitors are harder to evaluate than leaded parts for one simple reason – the circuit around them interferes with the reading. Parallel paths, nearby semiconductors, and power rail loading can all make a healthy capacitor look suspicious. That is why a fast pass-fail check on the board is useful, but it should not be mistaken for a complete diagnosis.

How to test SMD capacitor in real repair work

In practice, testing usually starts with the least invasive method and moves toward isolation only when the numbers do not make sense. For a technician or engineer, that means visual inspection first, then in-circuit resistance or short checks, then capacitance and ESR measurement, and finally out-of-circuit confirmation if needed.

The first pass is visual and thermal. Cracked MLCCs, discolored tantalums, and bulged polymer parts are obvious failures, but many bad capacitors show no visible damage. If a rail is shorted, a thermal camera, IPA evaporation, or controlled current injection may reveal which capacitor is heating. That method is often faster than trying to individually measure dozens of parallel decouplers.

If there is no obvious hot part, use a meter that can check low resistance and, ideally, capacitance and ESR directly at the component. Tweezer-style LCR tools are especially efficient here because they let you contact both terminations of small SMD parts without clip leads slipping onto adjacent pads.

Start with the fault mode, not just the nominal value

A capacitor can fail short, open, leaky, or drift out of tolerance. Each failure mode points to a different test approach.

A shorted capacitor is the easiest to catch. With power removed, measure resistance across the capacitor. A reading near zero ohms may indicate a failed part, but not always. On a power rail, you may simply be reading the low resistance of the rest of the circuit. This is where comparison helps. If one decoupling capacitor on a rail reads much lower than identical capacitors nearby, that part deserves attention.

An open capacitor is less obvious. Many meters will still show some capacitance in circuit because adjacent components create alternate paths. If a capacitor is suspected open, out-of-circuit testing is usually the cleanest way to confirm it.

Leakage and high ESR are the subtle failures. A capacitor can still show a capacitance value close to nominal while performing badly under load. This is common with aging electrolytics, but it can also matter with certain tantalum and polymer parts. On densely packed boards, ESR is often more revealing than capacitance because it reflects how the part behaves in the real power network.

In-circuit testing: fast, but conditional

When people ask how to test SMD capacitor parts, they often mean in circuit because removing components takes time and adds risk. In-circuit testing is useful, but the result has to be interpreted in context.

For decoupling capacitors connected directly across supply rails, in-circuit capacitance readings are often inflated because multiple capacitors are effectively in parallel. If you probe a 10 uF capacitor on a rail and read 47 uF, that does not automatically mean the part is wrong. You may be measuring the local network, not the single device.

Resistance checks have the same limitation. A rail-fed capacitor may appear shorted simply because an IC downstream presents a low resistance path. If the reading rises as the meter charges the network, that is generally different from a dead short that stays pinned near zero.

ESR can sometimes be measured more meaningfully in circuit, especially when the test frequency and surrounding topology allow the target component to dominate the result. Even then, treat the number as comparative rather than absolute unless you know the circuit well.

This is where a handheld tweezer LCR meter truly shines. Instant contact with automatic component identification, capacitance readings, and ESR measurement removes the friction from PCB troubleshooting, making thorough inspection fast and effortless. Furthermore, high-end All-in-One multimeters incorporate advanced diagnostic modes: they automatically switch to a lower test voltage to avoid turning on parallel semiconductor junctions, and feature Analog Signature Analysis (ASA) to map and compare complex circuit environments with ease.

Out-of-circuit testing: the clean answer

If the in-circuit reading is ambiguous, lift one side or remove the capacitor. That breaks the parallel paths and gives you the actual component value.

Once isolated, measure capacitance first. Compare the result against the marked value or the schematic. Keep in mind that many ceramic SMD capacitors have wide tolerances, and high-value MLCCs can measure lower under DC bias in actual operation than they do on a low-voltage meter. So a bench reading that looks acceptable does not always guarantee correct behavior in the circuit.

Then check ESR if the capacitor type makes ESR relevant. For electrolytic, polymer, and tantalum parts, ESR is a critical health indicator. For small MLCCs, ESR is typically very low, so a grossly abnormal reading is more useful than a fine-grained one.

Also check for leakage or unstable readings. A capacitor that will not settle, charges unpredictably, or reads inconsistently across repeated tests may be damaged even if the capacitance value appears close.

How to test SMD capacitor types correctly

Not every SMD capacitor should be judged by the same standard. The dielectric and construction matter.

MLCCs

Multilayer ceramic capacitors are common on digital, RF, and power boards. They fail short more often than many technicians expect, especially after board flex, drop damage, or thermal stress. Cracks are a major clue. In measurement terms, a shorted MLCC is straightforward to find, while a cracked MLCC that has gone partially intermittent can be harder. Mechanical pressure or board flex may make the fault appear and disappear, so intermittent cases often require careful handling.

Tantalum capacitors

Tantalum parts are often used where stable capacitance is needed in a compact package. When they fail, they can fail decisively. Check for shorts first, then verify capacitance and ESR out of circuit if needed. A tantalum with normal-looking capacitance but abnormal leakage is still suspect.

Aluminum polymer and electrolytic SMD capacitors

Capacitor degradation typically manifests as an elevated Equivalent Series Resistance (ESR) long before a catastrophic open or short circuit occurs. When troubleshooting power supplies that exhibit instability, excessive output ripple, or sluggish transient response, ESR measurement is usually the single most definitive test. A thorough diagnostic routine should evaluate ESR at 100 kHz (the industry benchmark for high-frequency ripple filtering) and measure nominal capacitance at 120 Hz (or 100 Hz, reflecting standard rectified line frequencies).

What tools make the process faster

A standard DMM is enough to catch some shorts and basic resistance behavior, but it is not the best tool for serious capacitor evaluation. Capacitance range on a DMM can help, though test speed and contact reliability are often poor on tiny parts.

An LCR or ESR meter designed for direct SMD contact is more effective. Tweezer electrodes improve repeatability, reduce pad-to-pad slip, and let you test mounted parts with less setup time. For repair benches and field diagnostics, that speed matters as much as raw accuracy. LCR-Reader style instruments are built around that exact workflow – identify the part quickly, measure it at the component, and move on without turning a five-minute check into a bench overhaul.

If you are working on fault isolation rather than simple value verification, a current-limited supply and thermal method should also be part of the toolkit. On dense boards with many parallel decouplers, heating behavior can locate the failed capacitor faster than meter probing alone.

Common mistakes that waste time

The biggest mistake is trusting an in-circuit capacitance number as if it belonged only to the component under the probes. On a populated PCB, it often does not.

The second is focusing only on capacitance. A capacitor can measure close to nominal and still be bad because ESR or leakage has shifted beyond what the circuit can tolerate.

The third is ignoring capacitor type. Comparing the ESR expectations of a ceramic capacitor to an electrolytic is not meaningful. The acceptable range depends on technology, value, voltage rating, package, and application.

Finally, poor contact causes bad data. Oxidized terminations, tiny pads, hand movement, and adjacent components all affect readings. Stable tweezer contact and repeated measurements help separate tool error from component behavior.

When replacement is smarter than more testing

There are times when replacing the capacitor is the efficient choice. If the part is inexpensive, the board symptom matches a common capacitor failure, and the measurement is borderline or inconsistent, replacement may cost less time than extended analysis.

That said, random replacement is not diagnosis. On multilayer boards and power rails with many identical capacitors, replacing the wrong part repeatedly can burn more time than a disciplined measurement process. The better approach is to narrow the suspect area, compare like-for-like parts, isolate when needed, and then replace with confidence.

A good capacitor test is not just about reading microfarads off a screen. It is about understanding what the circuit is doing to your measurement, choosing the right test method for the failure mode, and using tools that keep SMD handling precise instead of awkward. That is what turns capacitor testing from guesswork into efficient board-level troubleshooting.

Best Meter for PCB Diagnostics and Fault Finding

A PCB can look perfectly intact while a failed 0402 capacitor, high-ESR electrolytic, cracked resistor, or leaky diode stops the circuit from working. The best meter for PCB diagnostics is therefore not simply the meter with the most functions. It is the instrument that can make a reliable measurement at the component, in the location, and at the speed required to narrow the fault.

For most component-level work, that means combining practical access to small parts with the measurement modes that match the failure mechanisms on the board. A standard digital multimeter remains essential, but it is often not enough when the diagnosis depends on capacitance, inductance, ESR, or accurate low-resistance measurements on densely populated PCBs.

There Is No Single Universal PCB Diagnostic Meter

PCB diagnostics covers several different jobs. You may need to find a shorted power rail, confirm whether a resistor has drifted, identify an unknown SMD component, check a capacitor’s ESR, or compare a suspect circuit section with a known-good one. Each job places different demands on the meter.

A handheld DMM is usually the first instrument used at the bench. Its voltage, continuity, resistance, diode, and current functions make it effective for checking power distribution, fuses, connectors, transistor junctions, and obvious shorts. A DMM becomes less decisive when its probes cannot isolate a tiny component from adjacent pads or when its capacitance and resistance ranges do not provide enough resolution for the part under test.

An LCR meter adds direct measurement of inductance, capacitance, and resistance, often with test conditions better suited to passive-component verification. An ESR meter focuses on the equivalent series resistance that can make a capacitor fail in a switching supply even when its nominal capacitance still appears acceptable. The right choice depends on where the diagnostic process slows down most often.

Although standard LCR meters are widely used for PCB diagnostics, few compact multimeters provide a comprehensive diagnostic suite. Siborg’s All-in-One Multimeter instruments integrate high-precision LCR measurements with AC/DC voltage, frequency analysis, diode testing, and signal generation—meeting demanding benchtop accuracy specifications for lab and field use.

For many repair and production environments, the most efficient setup is not one oversized instrument. It is a reliable DMM for powered-board checks and a compact LCR or ESR-capable meter for unpowered component-level testing.

Choosing the Best Meter for PCB Diagnostics

Start with the types of components and failure modes you encounter. A board repair technician working on power supplies will prioritize ESR capability and low-ohm resolution. An engineer validating an RF matching network or sensor interface will place more weight on capacitance and inductance accuracy. A manufacturing team checking assembled SMD boards may value speed, repeatability, and direct tweezer contact more than broad measurement ranges.

Resistance resolution and low-ohm performance

Resistance measurement is not only for locating open resistors. Low resistance can reveal shorted rails, damaged current-sense resistors, solder bridges, and poor connections. Resolution matters because the difference between 0.02 ohms and 0.20 ohms may be meaningful in a low-voltage, high-current path.

Two-wire resistance readings include probe and contact resistance. On small parts, inconsistent probe pressure can become part of the measurement. If low-ohm work is routine, use short, clean leads and establish the meter’s residual reading before interpreting a result. A meter that supports relative or zero functions reduces this friction, although it does not replace four-wire Kelvin measurement when very low values must be verified precisely.

Capacitance, inductance, and ESR

Capacitance alone does not fully describe capacitor condition. Electrolytic capacitors can retain much of their rated capacitance while developing enough ESR to cause excessive ripple, startup failure, or unstable regulation. ESR measurement is especially useful around switching regulators, power-input stages, and older equipment with aluminum electrolytics.

Inductance measurement is valuable for identifying damaged inductors, checking replacement parts, and confirming values in filters or power stages. However, an in-circuit inductance reading can be influenced by parallel capacitors, semiconductor paths, and nearby components. A value that looks wrong is a reason to investigate, not always final proof that the inductor has failed.

A dedicated handheld LCR meter provides a stronger diagnostic result when it can identify resistance, capacitance, and inductance automatically and measure over practical ranges. A tweezer-style instrument such as an LCR-Reader is particularly useful when checking individual SMD passives without trying to hold two conventional probe tips on pads that are only a fraction of an inch apart.

Diode testing and junction behavior

Diode mode is one of the fastest ways to compare semiconductor paths across a PCB. It can identify shorted TVS diodes, failed rectifiers, shorted MOSFETs, and abnormal readings on IC supply pins. The useful result is often comparative: measure the same rail or junction direction on a known-good board, an adjacent channel, or an equivalent circuit section.

Check the meter’s diode-test voltage and current if semiconductor work is central to your process. Some junctions, LEDs, and protection devices do not respond predictably to every DMM’s test conditions. For LEDs, a dedicated LED or diode tester may provide more useful drive capability than a basic DMM mode.

Probe Access Is a Measurement Specification

A meter can have excellent published accuracy and still waste time if its probes cannot reach the component without slipping into adjacent pads. On modern assemblies, physical access is often the limiting factor.

Conventional pointed probes work well on test points, connector pins, through-hole leads, and larger solder joints. They are less convenient for 0201, 0402, and closely spaced 0603 parts. Fine tweezer probes allow both terminals of an SMD component to be contacted at once, which improves control and reduces the chance of bridging nearby circuitry with a probe tip.

Contact quality affects every measurement. Oxidation, conformal coating, flux residue, and worn probe surfaces can create unstable resistance and capacitance readings. Keep tips clean, replace worn tips, and use the lightest pressure that establishes a consistent connection. Excess force can crack a small ceramic capacitor or lift a weak pad from a reworked board.

Understand the Limits of In-Circuit Testing

In-circuit testing is fast because it avoids removing parts, but it is not automatically definitive. Parallel components can lower an apparent resistance or capacitance. Semiconductor junctions can conduct during the test. A capacitor’s measured value may include other capacitors connected across the same rail.

In-circuit component testing requires navigating complex circuit topology. Parallel rail capacitors often yield inflated capacitance readings, while feedback loops cause resistors to read far below their marked values.

By pairing precision component measurements with Analog Signature Analysis (ASA), diagnostic workflows become significantly faster and more reliable. ASA injects a safe, current-limited AC test signal to generate a distinctive VI curve for each node, enabling instant visual comparison with a known-good board. This makes it easy to isolate defective ICs, damaged diodes, and subtle PCB faults that standard numeric measurements alone can’t clearly resolve.

The practical approach is to use in-circuit measurements for screening and comparison. When a reading conflicts with the design value or with a known-good board, isolate the component by lifting one end or removing it if the repair decision requires certainty. This step takes time, but it prevents replacing good parts based on misleading parallel-circuit readings.

Build a Meter Workflow Around the Fault

The fastest diagnostic sequence begins with the board state. Before applying power, inspect for physical damage, measure resistance from major rails to ground, and check protection devices and obvious power-path components. Continuity and diode mode are efficient for locating gross faults without risking additional damage.

Next, power the board only when the initial checks do not indicate a destructive short. Use voltage measurement to verify input power, regulated rails, references, enables, and expected voltage drops. If a rail is present but unstable, move to the passive components around its regulator and check suspect capacitors for ESR, capacitance, or short-circuit behavior.

For intermittent or channel-specific faults, comparison is often more valuable than an isolated specification. Measure equivalent parts on a functioning channel and the failing channel using the same meter settings and probe position. A small difference may be normal; a major difference directs attention to the component or network that deserves closer inspection.

When selecting a meter, prioritize the functions you use repeatedly, then verify that its range, resolution, accuracy, and probe geometry support those measurements on real boards. A broad feature list has little value if the meter cannot contact the part reliably or distinguish the value range that matters.

The most useful instrument is the one that turns a suspect pad into a credible measurement before the board leaves the bench. Keep a capable DMM close for circuit-level checks, then use a precision component meter when the diagnosis reaches the small passive parts that determine whether the repair is actually complete.

LCR Meter Guide: How It Works, Key Specs, and Why Consider LCR-Reader

If you work with real-world components, you already know that printed values and reality rarely match. Tolerances, aging, temperature, damage, and counterfeit parts all conspire to make passive components behave unpredictably. That’s where an LCR meter becomes essential.

This guide walks through what an LCR meter does, how it works, the specs that actually matter, and practical use cases for engineers, technicians, and serious hobbyists. We’ll then look at how LCR-Reader devices from https://lcr-reader.com differ from traditional LCR meters and when a handheld tweezer-style meter is the better tool.

What is an LCR meter?

An LCR meter is an electronic test instrument that measures the primary parameters of passive components:

  • L – Inductance (coils, inductors, chokes)
  • C – Capacitance (capacitors)
  • R – Resistance (resistors and equivalent series resistance in capacitors/inductors)

Modern LCR meters also commonly measure related parameters such as:

  • ESR (Equivalent Series Resistance)
  • Q factor (quality factor)
  • D (dissipation factor)
  • Impedance and phase angle

In other words, instead of just giving you a DC resistance or a nominal capacitance, an LCR meter characterizes the component’s AC behavior at a specific test frequency and voltage. This is critical for real-world RF, power, analog, and precision digital designs where parasitics and losses matter.

How an LCR meter works (without the math headaches)

Different LCR meters use different internal techniques, but most modern instruments follow the same basic idea:

  • Apply an AC stimulus: The meter applies a small AC signal (voltage or current) to the component under test, typically at selectable frequencies (e.g., 100 Hz, 120 Hz, 1 kHz, 10 kHz, 100 kHz, sometimes higher).
  • Measure voltage and current: It measures both the magnitude and phase of the voltage and current through the device.
  • Compute impedance: From these measurements, it calculates the complex impedance:

Z = V / I = |Z| · ejφ

where |Z| is magnitude and φ is phase angle.

  • Map to an equivalent circuit: The meter then fits these impedance values to an equivalent circuit model – either series or parallel:
  • Series model: R + X (where X is reactance of L or C in series)
  • Parallel model: R ∥ X

Depending on your selection (or auto mode), the meter reports L, C, or R, plus D, Q, or ESR based on that model.

  • Display the chosen parameter(s): You choose which parameters to display (e.g., C + ESR, L + Q, R + θ), or the meter auto-selects based on the component’s behavior.

Measurement techniques under the hood

Most modern LCR meters use one of these methods:

  • AC bridge methods (historical and some precision bench meters)
  • Auto-balancing bridge / impedance analyzer architecture
  • Current–voltage (I–V) measurement with digital signal processing

For most users, the key takeaway is not the implementation, but how it affects:

  • Accuracy and resolution
  • Frequency range
  • Measurement speed
  • Ability to handle very small or very large components

Key LCR meter specifications that actually matter

When you evaluate or compare LCR meters, these specs have the biggest real-world impact.

1. Frequency range and available test points

Components behave differently at different frequencies. A capacitor’s ESR, an inductor’s self-resonant behavior, and even a resistor’s parasitics all vary with frequency. Look at:

  • Lowest frequency (e.g., 20 Hz or 100 Hz) – useful for bulk capacitors and power applications.
  • Standard test frequencies (100/120 Hz, 1 kHz, 10 kHz) – align with datasheet specs.
  • High-frequency range (100 kHz, 1 MHz+) – useful for RF and high-speed applications.

If you need to verify parts against a datasheet, ensure the LCR meter can measure at the same frequencies the manufacturer uses.

2. Basic accuracy and measurement ranges

Vendors typically specify basic accuracy for each parameter (L, C, R) and at specific frequencies and ranges (e.g., ±0.1% reading ±0.01% range).

Check:

  • Accuracy at the frequencies you care about
  • Min/max ranges for L, C, and R
  • ESR and D/Q accuracy, if you rely on those parameters

For many production or troubleshooting tasks, 0.5–1% accuracy is more than adequate. For precision component characterization, you may need 0.1% or better.

3. Test signal level (voltage/current)

Test level affects both measurement fidelity and component stress.

  • Electrolytic capacitors and some ceramics can be voltage-dependent.
  • Inductors can saturate or behave nonlinearly at higher currents.

Useful features include:

  • Selectable test voltage (e.g., 0.1 V, 0.5 V, 1 V)
  • Low-level testing for sensitive parts
  • Higher-level testing to mimic actual operating conditions

4. Measurement speed and usability

In R&D, you might accept slower measurements if you are getting deep characterization. But in production, repair, and field service, throughput and ease of use often matter more.

Consider:

  • Single vs multi-parameter display (e.g., C + ESR at once)
  • Auto-ranging and auto-component detection
  • Time to stable reading
  • How many button presses it takes to switch functions
  • Form factor (bench-top vs handheld vs tweezer-style)

5. Fixture and connection method

Accuracy is only as good as your fixturing:

  • Bench LCR meters often require dedicated fixtures, Kelvin clips, or test jigs.
  • Handheld LCR meters may use standard leads, alligator clips, or tweezers.

Stray inductance, capacitance, and contact resistance can dominate your measurement if the connection method is poor—especially for small SMD parts.

Tweezer-style probes, as used in LCR-Reader devices from https://lcr-reader.com, directly contact both ends of an SMD part, dramatically reducing lead inductance and parasitics.

Common applications of an LCR meter

Component identification and verification

When you pull an 0402 part off a board, it’s rarely labeled. An LCR meter can:

  • Distinguish between R, L, and C automatically
  • Verify the nominal value within tolerance
  • Check ESR on capacitors to spot degradation

This is essential in repair, rework, and reverse engineering.

Incoming inspection and quality control

Many organizations use LCR meters on the receiving dock or in QA to:

  • Spot mis-labeled or counterfeit components
  • Verify that reels meet spec for critical designs
  • Screen for outliers in bulk shipments

Fast, easy measurement is critical here—especially when checking random samples from thousands of components.

R&D and characterization

In R&D labs, LCR meters help you:

  • Characterize new component types across frequency and voltage
  • Determine ESR and Q for RF and power applications
  • Validate that simulated models match real-world behavior

Higher-end bench LCR meters shine here with wide frequency coverage and advanced measurement modes, but portable meters are often used for quick checks at benches and testbeds.

Field service and repair

Repair technicians and service engineers use LCR meters to:

  • Find failed capacitors (high ESR or reduced capacitance)
  • Sort unknown or unmarked passives
  • Validate replacements during repair

Portability, speed, and single-handed operation become more important than very high precision in this context.

Types of LCR meters: bench, handheld, and tweezer-style

Bench-top LCR meters

Bench instruments typically offer:

  • High accuracy and resolution
  • Broad frequency range (often up to MHz)
  • Configurable test levels and bias
  • PC interfaces and automation support

They’re ideal for R&D and formal characterization, but they’re larger, more expensive, and slower to deploy for quick tasks on a PCB.

Traditional handheld LCR meters

Handheld LCR meters trade some performance and configurability for portability:

  • Battery-powered and compact
  • Limited but practical frequency ranges
  • Basic accuracy sufficient for most troubleshooting
  • Often require leads or clips to connect to components

For through-hole parts or large SMDs, this is fine. But for small SMD passives, leads add significant parasitics and make handling awkward.

Tweezer-style LCR meters (like LCR-Reader)

Tweezer-style meters integrate the test probes directly into the instrument body as precise tweezers. This design:

  • Allows one-handed operation
  • Simplifies grabbing very small SMD components on or off PCBs
  • Minimizes lead inductance and stray capacitance
  • Speeds up sorting and verification work dramatically

LCR-Reader, from Siborg, is a family of such handheld tweezer LCR meters available at https://lcr-reader.com. They are designed specifically to streamline work with modern high-density PCBs, where traditional benchtop setups are often overkill and slower to use.

Where traditional LCR meters fall short in daily work

Even if you already have a good bench LCR meter, you may find it underused for routine tasks because of:

  • Setup overhead – powering on, connecting fixtures, selecting ranges and frequencies.
  • Operator friction – multiple button presses and menu steps for each measurement mode.
  • Poor ergonomics for SMD – trying to grab tiny parts with clip leads can be frustrating.
  • Limited portability – carrying a bench meter to production lines or a client site is impractical.

For engineers, technicians, and hobbyists dealing with frequent, repetitive measurements of small passives, speed and simplicity often trump having every imaginable parameter.

This is where LCR-Reader devices provide a more efficient approach.

How LCR-Reader simplifies LCR measurement

LCR-Reader devices, available from https://lcr-reader.com, were built around a few core ideas:

  • Automatic component recognition: The meter identifies whether the device under test is acting like an R, L, or C and selects the appropriate measurement function automatically.
  • Integrated, precise tweezers: Gold-plated tweezer tips act as Kelvin probes, letting you:
  • Grab SMD passives directly on a board
  • Measure loose components from reels or bins quickly
  • Operate the meter with one hand while the other hand is free for notes, tools, or holding the board
  • Optimized test conditions: LCR-Reader models are designed with practical test frequencies and levels that suit most everyday measurement tasks (e.g., verifying values, checking ESR, sorting parts), while maintaining good accuracy.
  • Fast, streamlined workflow: With minimal buttons and automatic modes, measurements become fast and nearly frictionless:
  • Place the tweezers on the part
  • Read value + secondary parameter (e.g., C + ESR) on the display
  • Move to the next part

Over the course of a shift in production, QA, or repair, this reduction in per-component effort adds up to substantial time savings.

Typical use cases where LCR-Reader excels

SMD component sorting and reel verification

When incoming reels or bulk SMD parts arrive, you may need to:

  • Randomly sample components and verify value and tolerance
  • Confirm that a reel marked with one value is not actually another
  • Segregate mixed or unknown batches

With a traditional LCR meter, this can be tedious. With a tweezer-style LCR-Reader, you can:

  • Pinch components directly from tape, tray, or PCB
  • See value and, where helpful, ESR or D immediately
  • Sort and verify large batches quickly

On-board troubleshooting and repair

On populated boards, you often need to check:

  • Whether a capacitor has failed (e.g., abnormally high ESR)
  • The approximate value of a resistor network or discrete part
  • Whether an inductor is open, shorted, or way off spec

LCR-Reader allows you to touch the component in situ (where circuit topology permits) without disconnecting leads or setting up separate clips. For field work or on-site repair, this massively reduces friction.

Rapid prototyping and lab work

In R&D, you may still rely on a precision bench LCR meter for deep characterization. But for quick tasks like:

  • Checking that you grabbed the right SMD value from a loose pile
  • Verifying parts before soldering to a prototype
  • Spot-checking passives on a breadboard or test fixture

LCR-Reader offers a fast, low-effort alternative that lives on your bench and gets used constantly.

Choosing between a traditional LCR meter and LCR-Reader

In practice, many teams end up with both a bench LCR meter and one or more LCR-Reader units. Here’s a pragmatic way to decide what to use when.

When a bench LCR meter is the right tool

  • You need characterization across many frequencies (e.g., 20 Hz to 1 MHz+)
  • You require very high accuracy and traceable calibration
  • You’re working with specialized components under unusual bias conditions
  • You need PC connectivity, automation, and scripting

When LCR-Reader is the better choice

  • You do frequent SMD measurement and sorting
  • You prioritize speed and convenience over ultra-high precision
  • You work in production, QA, repair, or field service
  • You want portable, battery-powered tools that live in a pocket or toolkit

If you recognize your day-to-day tasks in the second list, adding a tweezer-style LCR meter like LCR-Reader will likely have an immediate impact on your workflow.

You can explore available models and options directly at https://lcr-reader.com.

Best practices for getting accurate results with any LCR meter

Regardless of whether you use a bench meter, a handheld, or an LCR-Reader, these practices will improve your measurements.

1. Use the right frequency and test level

  • Match datasheet conditions where possible.
  • For power capacitors, test near the actual ripple frequency or relevant harmonics.
  • Use lower test levels for sensitive parts, higher ones if you need to simulate real operating conditions.

2. Pay attention to series vs parallel model

Make sure the displayed value corresponds to the appropriate equivalent circuit for your application:

  • Series mode is common for components used in series (e.g., series capacitors with ESR).
  • Parallel mode is more suitable for components used in shunt or filter topologies.

Switching between models can change apparent ESR, Q, or D readings—interpret results in context.

3. Compensate for fixtures and leads

If you are using leaded fixtures, clips, or long connections:

  • Use open and short compensation functions where available.
  • Keep leads as short as is practical.
  • For very small values (nH, pF, mΩ), consider fixture design carefully or use tweezers.

Integrated tweezers, such as those in LCR-Reader devices, substantially reduce these parasitic effects for small SMD components.

4. Be mindful of in-circuit measurements

In-circuit measurements can be convenient but tricky:

  • Parallel paths may affect the reading.
  • Nearby components can introduce additional reactance.

Use in-circuit measurements as screening tools, and lift one lead or remove components for definitive characterization when necessary.

Where to learn more or purchase LCR-Reader

If you routinely work with SMD passives and want to reduce the friction of everyday measurements, it’s worth evaluating a tweezer-style LCR meter.

Siborg’s LCR-Reader family is purpose-built for this kind of work. For detailed specifications, model comparisons, and purchasing options, visit the official site:

You’ll find different models tailored to various accuracy, feature, and budget requirements, all built around the same core idea: making LCR measurements faster and simpler.

FAQ: LCR meters and LCR-Reader

1. What is the difference between a DMM and an LCR meter?

A digital multimeter (DMM) mainly measures DC/AC voltage, current, and resistance, sometimes capacitance. It typically uses simple DC methods and offers limited (or no) inductance measurement. An LCR meter is designed specifically to measure inductance, capacitance, and resistance under AC conditions at defined test frequencies and levels, and often reports ESR, Q, D, and phase. For accurate component characterization, especially for inductors and capacitors, an LCR meter is the appropriate tool.

2. Can an LCR meter measure components in-circuit?

Sometimes, but with caveats. In-circuit measurements can be distorted by parallel and series paths in the circuit. For quick screening (e.g., identifying a clearly failed capacitor with very high ESR), in-circuit readings can be useful. For accurate values, it’s usually best to remove at least one lead from the circuit. Tweezer-style LCR meters like LCR-Reader make this process faster since they can easily grab small parts once they’re lifted.

3. How accurate are handheld LCR meters like LCR-Reader compared to bench meters?

High-end bench LCR meters can reach extremely high accuracies (better than 0.1%) across a wide frequency range. Handheld LCR meters such as LCR-Reader are optimized for practical accuracy, speed, and portability. For many production, repair, and general lab tasks, their accuracy is more than sufficient, especially when measuring common resistor, capacitor, and inductor values. For formal characterization or compliance testing, a precision bench instrument is still recommended.

4. Do I still need a bench LCR meter if I buy an LCR-Reader?

It depends on your work. Many teams use both: a bench LCR meter for detailed characterization and specialized tests, and an LCR-Reader for everyday measurement, sorting, and troubleshooting. If your primary need is fast verification of SMD passives, LCR-Reader may cover most of your day-to-day tasks by itself.

5. Where can I get more information or purchase LCR-Reader?

You can find full product details, specifications, and purchasing options at the official site:

There you can compare models, review features, and choose the LCR-Reader that best fits your workflow and accuracy requirements.

LCR-Reader Showing at EPTECH on Demand, Including New Model with 250 kHz Test Frequency

Siborg is showing the LCR-Reader line, including the new LCR-Reader-R2, at EPTECH On Demand on Wednesday September 15, 2021.

For 30 years, EPTECH has been showcasing products and services to the EP&T audience of electronic engineers and designers across the globe. This year is a virtual even where speakers are presenting to online attendees. Siborg will be presenting on Wednesday, September 15th at 3:20 – 3:50 EDT.

Siborg will be presenting “Quick and Accurate Characterization of Surface Mount Components and Data Acquisition Tools” will cover their current selection of test equipment. Siborg will go over the importance of component characterization and how their LCR-reader line of test devices can maximize efficiency while identifying components in a fast-paced environment, including tools that remotely record measurement values for quality control. The presentation will cover their LCR-Reader line and cover the abilities of each device.

Siborg Establishes a Branch in Germany to Promote LCR-Reader Family

Siborg Establishes a Branch in Germany to Promote LCR-Reader Family

Siborg has established a branch of the company in Germany, allowing better access to European customers. By establishing a branch, customers will have shorter wait times for shipping and will have lesser duties on products compared to when shipping from Canada.

New LCR-Reader-R2 Ready for Release

Siborg’s newest device, the LCR-Reader-R2 is read for release. The new device is based on LCR-Reader-MPA, with features from the previous model and better stability for testing in-circuit measurements. The ability to switch test signal source resistance from 100 Ohms to 1.4 kOhms. The higher source resistance reduces noise when measuring small inductances.

R2 utilizes a different, more powerful MCU and therefor allows to process measurement at higher frequencies. This also allowed an implementation of additional test feature, the Analog Signature Analysis. ASA is a circuit board troubleshooting technique that uses an AC sine wave across two points of an electronic component or a circuit. The resulting waveform is displayed using current and voltage as x and y axis. This signature is compared to that of the known good circuit board or component allowing to determine the board or component health.

The R2 was supposed to initially have a 300 kHz test frequency, but after some preliminary testing, 300 kHz was too high without sacrificing measurement accuracy. The 250 kHz test frequency, along with the change in source resistance, is very important while testing small capacitance and inductances, and also while testing in-circuit.

The major differences between MPA and R2 is the removal of AC/DC current measurements, AC/DC voltage measurements up to 15 V, Frequency meter and Oscilloscope mode.

Features on R2:

  • Automatic and manual LCR, ESR, LED/Diode measurements
  • 0.1% basic accuracy
  • Automatic test signal reduction to 0.1 V for in-circuit measurements
  • Three test signal levels, 0.1, 0.5 and 1 Vrms
  • Automatic and manual test frequency, including 100, 120 Hz, 1, 10, 20, 30, 40, 50, 60, 75, 100 and 250 kHz
  • Measures components to a 0201 size (0.3 mm)
  • Parasitic offset removal using easy Short/Open Calibration
  • 1.5 oz. weigh
  • Backlit LCD
  • Displays active and reactive impedance compoennts
  • gold-plated test leads
  • NIST traceable calibration certificate.

Las Vegas EDS Summit 2022

Siborg Systems Inc. was expecting to be at EDS Summit 2021, but it has been cancelled. The summit will now be held May 10-13, 2022 at the Mirage in Las Vegas.

The EDS Summit is a leadership summit for component manufacturers, distributors and representatives. The week is used for networking and matchmaking by industry professionals and bring groups of bright minds together to exchange ideas.